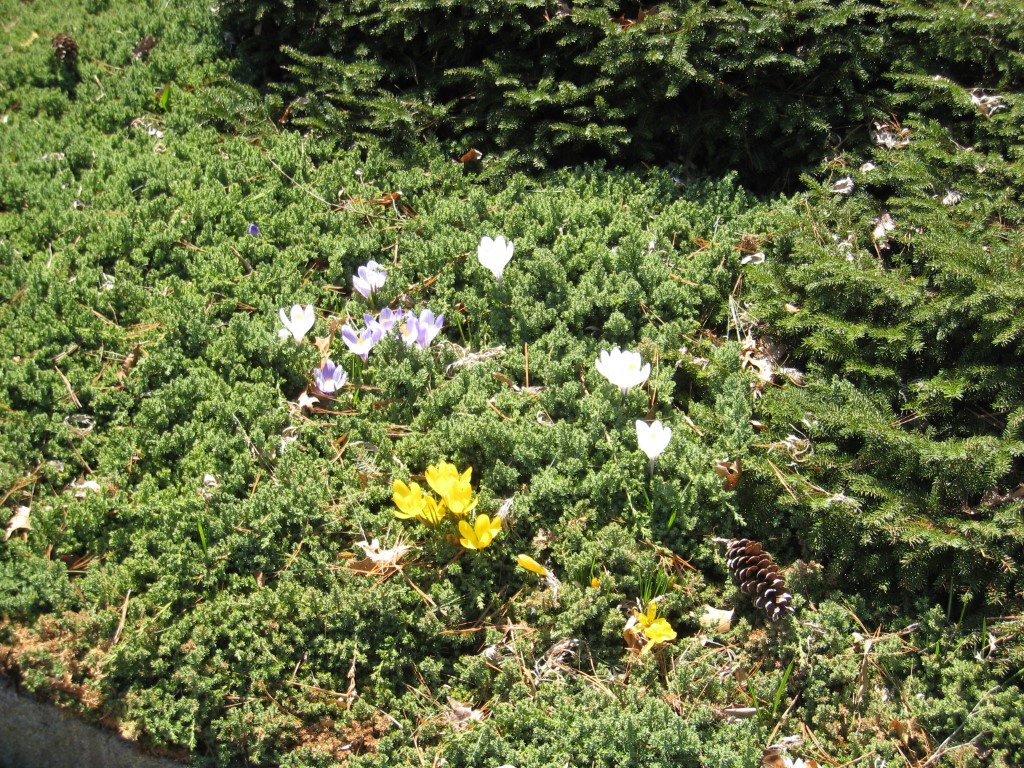
Arriving at a new job-site the other day we came across this patch of spring bulbs. They were crocus poking up through the Japanese Juniper ground-cover.
They’re certainly not one of the formal-use type spring bulbs. Crocus are more informal and typically used in naturalized settings.
My guess is this quirky but beautiful scene wasn’t planned, but just happened.
I’m thinking the juniper was planted at a time of year when the crocus were below ground and not visible.
During my schooling I remember an instructor who suggested filling a bucket with spring bulbs, such as crocus and daffodils, and broadcasting them around by hand. Then plant them wherever they lie.
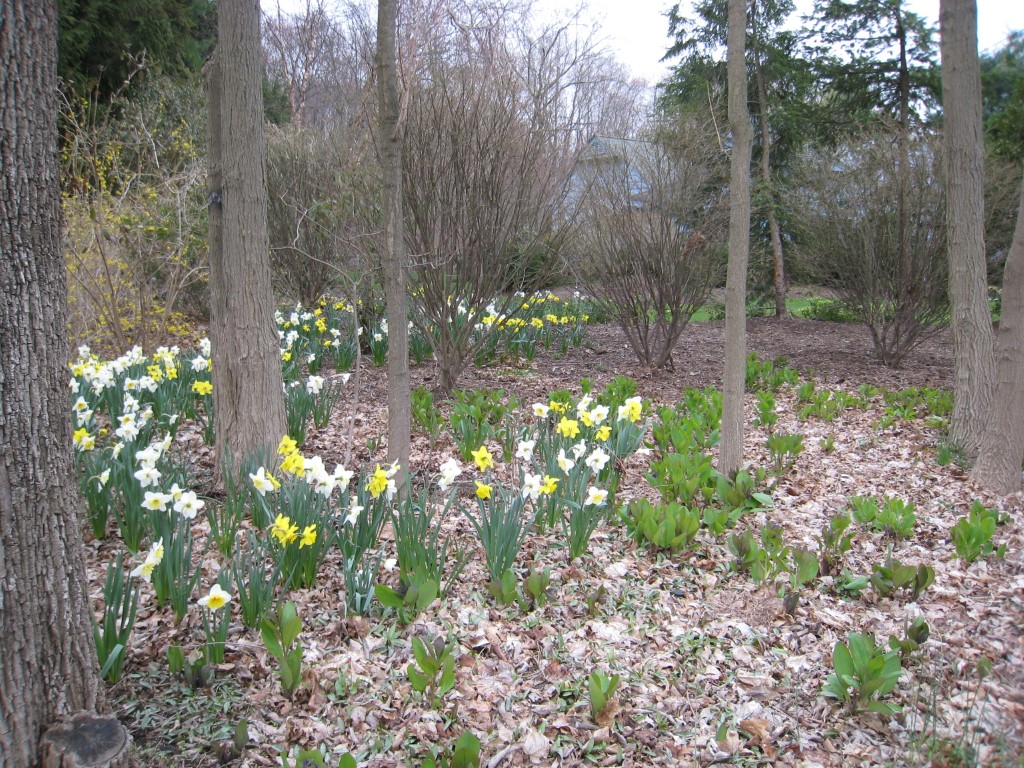
Yes, he was a little “free-spirited,” but he made a valid point. With bulbs such as these try to think creatively and in an uncontrived manner just as nature would display her colors and plants.
The other important point here is if you intend to do bulb planting for spring color, mark it on your calendar for the fall. This is when the garden centers bring in their selections.
Things To Know About Spring Bulbs
Why plant spring bulbs in the fall you ask? 2 reasons:
- So the bulbs have time to develop a root system before winter.
- To satisfy the cold requirements of the bulbs to flower in the spring.
Let the soil temperatures cool from the summer heat before planting. Rule is 60 degrees or below.
You don’t have to go sticking a meat thermometer in the ground. 🙂 Soil that is “cool to the touch” works just fine. Here in northern New Jersey we start planting spring bulbs in October.
If you have to store the bulbs for awhile before planting, choose a spot that is cool and out of direct sunlight.
Drainage, like with so many other plants, is key. Make sure it’s not a low lying area or one with heavy, constantly wet soil.
Here’s a great “bulb” reference from Rutgers University with additional information and a planting-depth chart for reference.
Bulb Planting Methods
On our landscape projects we’ll install bulbs in either of two ways:
- Excavate the bulb planting area. The soil is removed and lowered to the recommended planting depth for that bulb type. Loosen the base soil a bit to help drainage. You can also amend the soil with peat and compost at this time if needed. Also, mix in a slow release fertilizer.
- Drill individual holes with a bulb auger. We use a heavy duty electric drill with a 1/2″ chuck. This is a great method for quickly and efficiently planting bulbs.
Let’s face it, sometimes we’re all a little “burnt out” for gardening work come fall.
You just have to think about the great show of color in the spring after a long winter — and that usually motivates us to this one last chore.
For those in the trade, it seems like every homeowner loves the idea. If you ask, they’ll likely go ahead with the work. Plus, it gets your project looking extra special first thing in the spring.