
I know that design (including lighting design) can be a subjective topic – having said that, I avoid lining walkways with closely spaced pathlights like the plague. There are better ways to arrange and use pathlights.
I really don’t want to get too involved discussing this “runway” use of pathlights because I have another issue to talk about. But with regard to the picture above, I would have chosen a decorative lamp post and lantern to light the steps and walk. It would have been a more elegant and appropriate look for this home.
In future posts I’ll talk more about landscape lighting design including effects and the fixtures to use.
A Common Installation Mistake
What really kills the look of any pathlight in any situation is when they are out of plumb, i.e. not exactly straight.
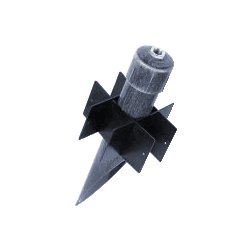
One of the most common installation shortcomings with landscape lighting is the method used for mounting the fixtures in the ground.
Many of these fixtures are packaged with their own “mounting stake,” which is usually about 8 inches long and 1.5 inches wide .
.
There is no way a stake like that can support and keep straight an outdoor fixture, especially over time and exposure to the elements.
The end result is a crooked fixture and lighting performance that is not doing what it’s supposed to.
Ask your installer what method and device he or she is using to mount the fixtures. If the device seems inadequate ask if you can upgrade to a more substantial mounting system. Yes it will be a bit more money, but can you imagine investing in this beautiful lighting system and then having the fixtures tilt and move in their spots?
Upgrading later would be another project unto itself that involves disturbing the landscape again, plus the added labor cost to change from one device to another. As the old saying goes, “Do it right the first time.”
The picture to the left is a Perma-Post by Hadco. It is made of thick wall PVC, 3″ in diameter and 19″ long. This is an excellent device for mounting landscape lighting fixtures. They cost about $27 a piece (yes, that can really add up when you have many fixtures). For line voltage fixtures (110 volt) it is definitely the way to go. Again it offers an extremely sturdy base and the electrical splices are contained within the PVC tube and cap.
An Inexpensive and Sturdy Mounting Method
For low voltage fixtures (12 volt) there’s a mounting method I’ve used that is relatively inexpensive and very effective.
We cut 4″X4″ pressure treated lumber to 10 – 12″ lengths and then use a single hole, standard electrical mounting plate attached to the top of the 4X4 with exterior deck screws. All the low voltage splices are made using waterproof, gel-filled wire nuts.
Besides the low cost, another great feature is when the fixture is hit hard by someone or something (and it will), the $3 aluminum mounting plate breaks and not the fixture. The mounting plate is easily replaced. 
